Alternatives to floral foam and making a flower grid
I haven’t used floral foam for years, and was surprised to find, given everything we know about its contribution to microplastic pollution, that it is still available, and still frequently used by florists. Although so far no one has come up with anything quite so effective, I still wouldn’t ever use it again, and there are a number of far more eco-friendly solutions.
I’m not a fan of the florist’s tape and chicken wire solution: the wire is a bit awkward to use, not to mention rather carnivorous, and anyway, the tape isn’t reusable and a bit dodgy environmentally too. I’ve tried the Holly Chapple Pillows, but they haven’t worked very well for me either. Sod’s law that I buy one of each and can’t make them work with any of my vases. I see that Hope Flower Farm does sell not only the pillows but also lovely little vases specifically designed to use with them, but these are available only in the USA. Anyway, judging by the online demonstrations I’ve seen using the pillows, it seems most people end up resorting to floral tape to hold them in place.
An alternative I look forward to trying is the FloraGUPPY. It’s plastic, yes, but it’s described as 100-percent reusable and recyclable and its flexible form means that one size adapts to many shapes and sizes of vase. It’s been around since 2019 and had great reviews. It really looks promising. I was sad to be unable to find it for sale anywhere at the moment, but got in touch with the company and apparently it will be available again via the website on 30 September 2022. There’s even a video you can watch to see how it works. I’ll do a review of the FloraGUPPY as soon as I can get one.

Making your own flower grid
In the meantime, I’ve been experimenting with my own eco-friendly alternatives, and have started using homemade flower grids. These are completely natural, not a whiff of plastic about them. Admittedly the first few you make can be a bit of a faff to tie together, but once you get the hang of it they are really quite easy.
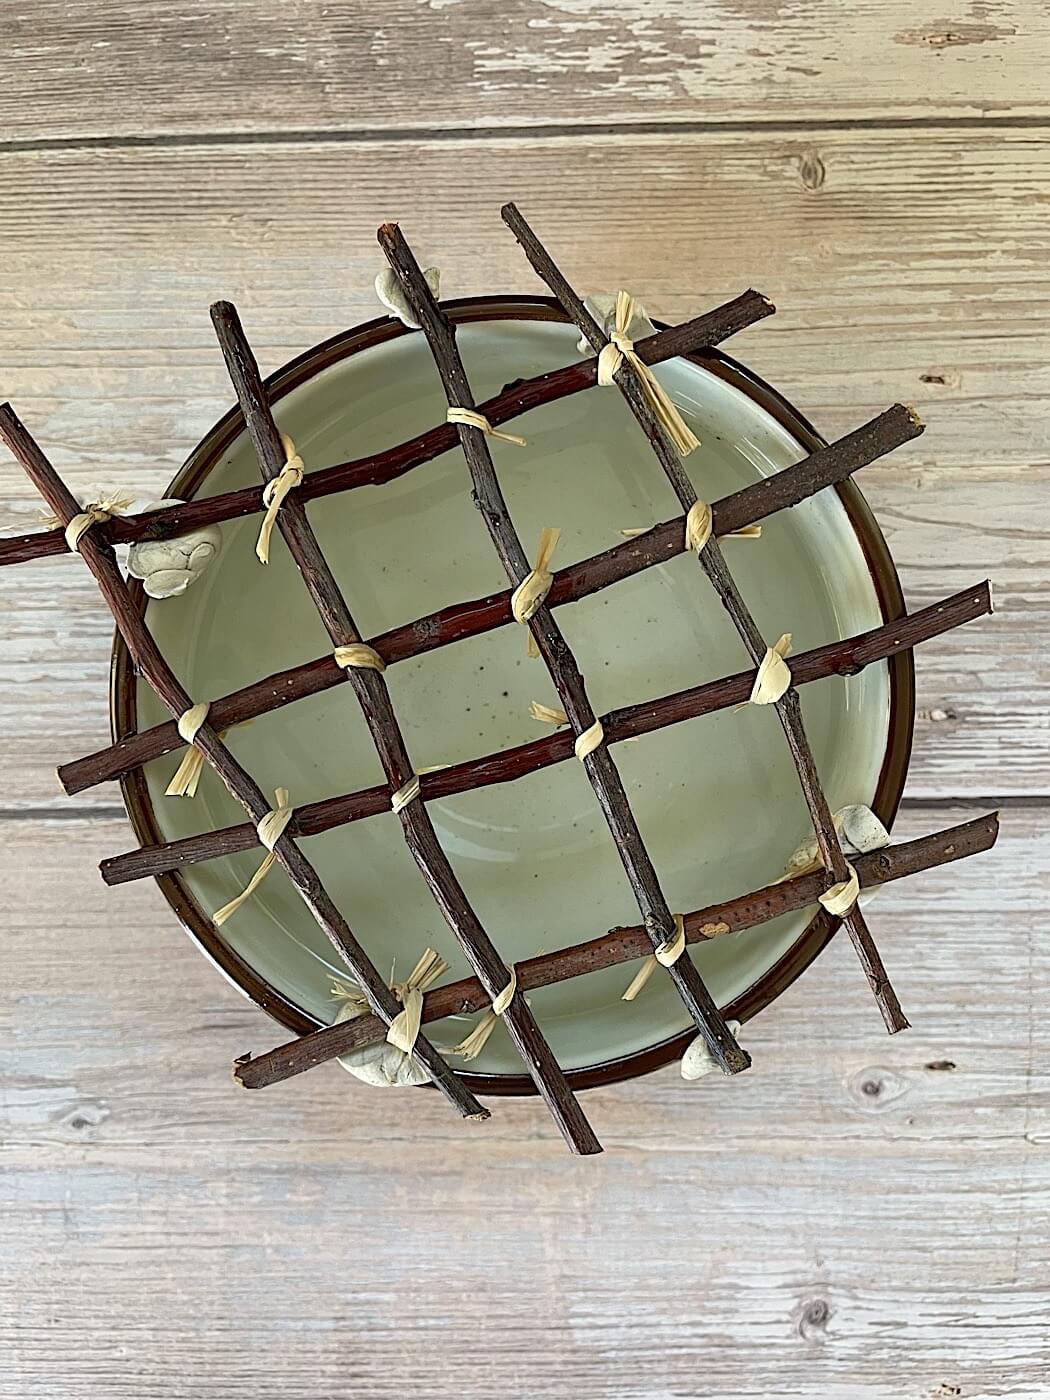
Take the bowl you want to use and cut a number of thin but strong twigs (as straight as you can find) into the lengths you will need to make a grid over your bowl. Then start tying them together – you could use wire or string, I suppose, to make them more solid, but I liked using raffia. The first one I made (above) was no work of art, but it served its purpose rather well. You could also weave them together if you’re good at that sort of thing. You’ll see that I tried using white tack to keep it attached to the bowl, but then I realised how unnecessary that was (and not particularly eco-friendly).
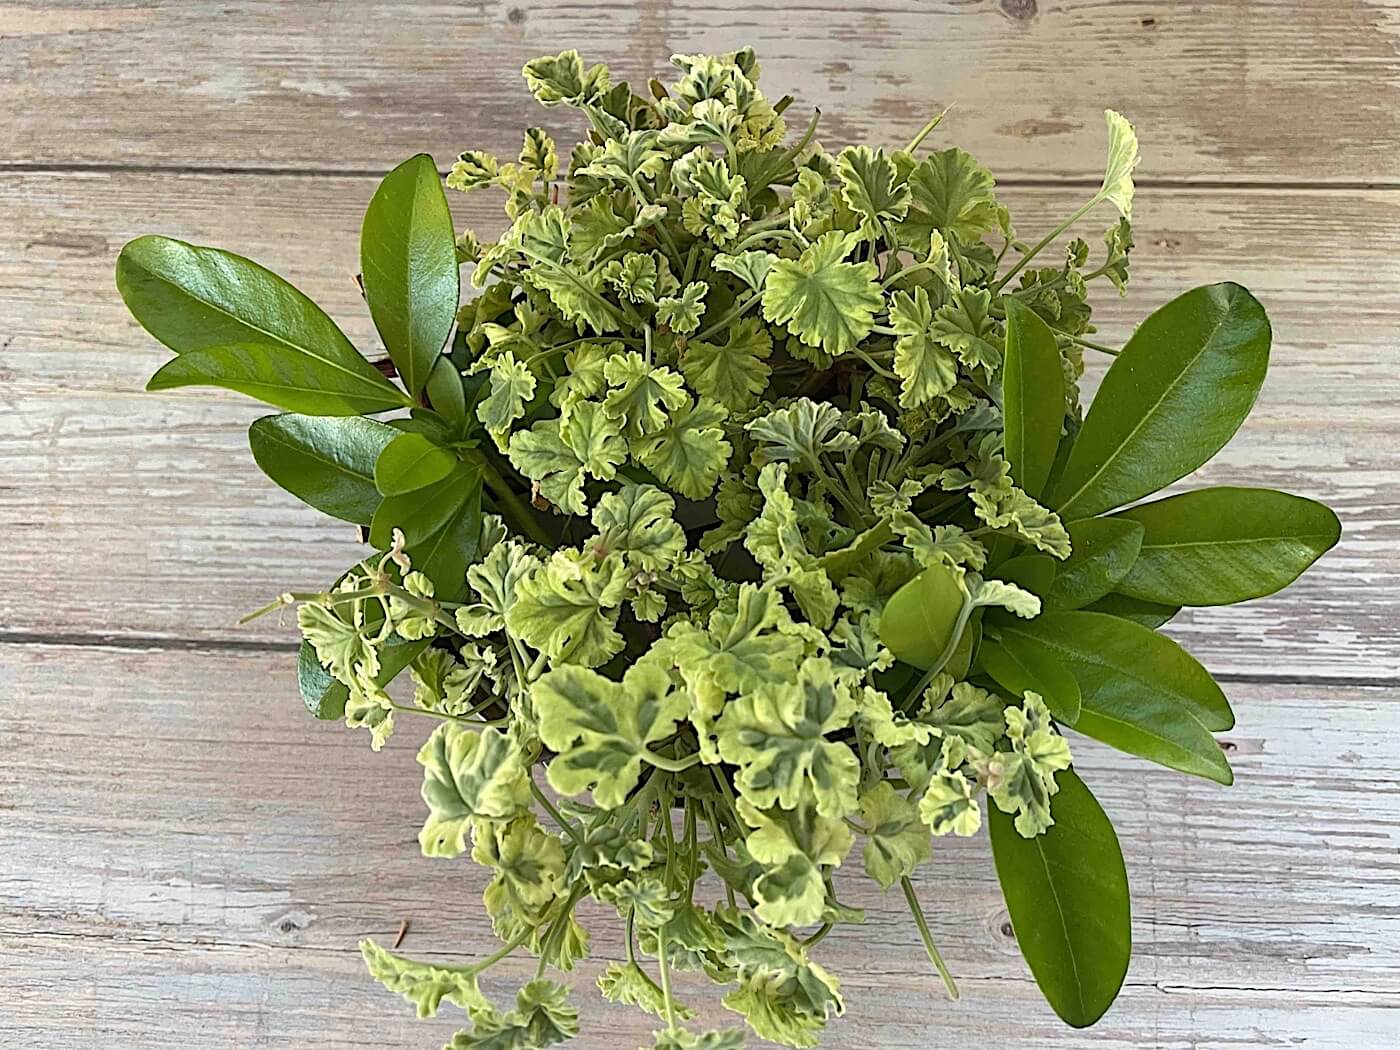
The next step is to put in some long-lasting foliage to form a base. I went for a variegated nutmeg scented leaf geranium and some Choiysa ternata or Mexican orange blossom; I dipped the ends of the latter in just boiled water for 15 seconds.
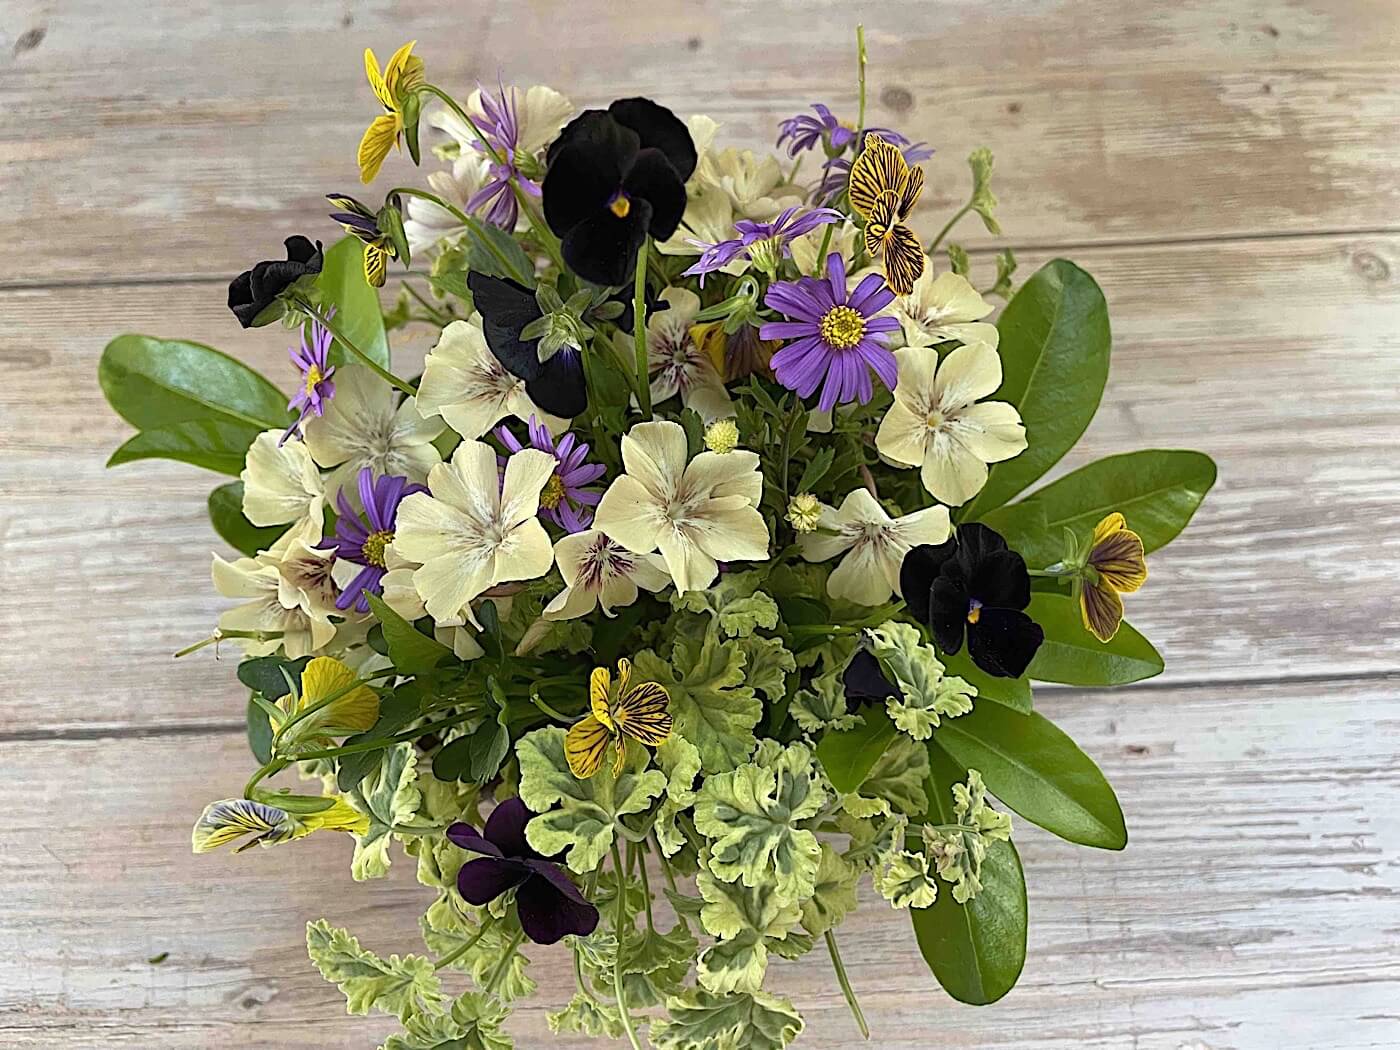
After this I added some flowers to the base, here, Phlox drummondii (the stuff has been flowering without being deadheaded since May and doesn’t seem to want to stop – it really is a very useful plant), followed by a few violas and some Swan River Daisy. Do you like those ‘Tiger Eye’ violas? I think I do, but I’m not 100% sure.
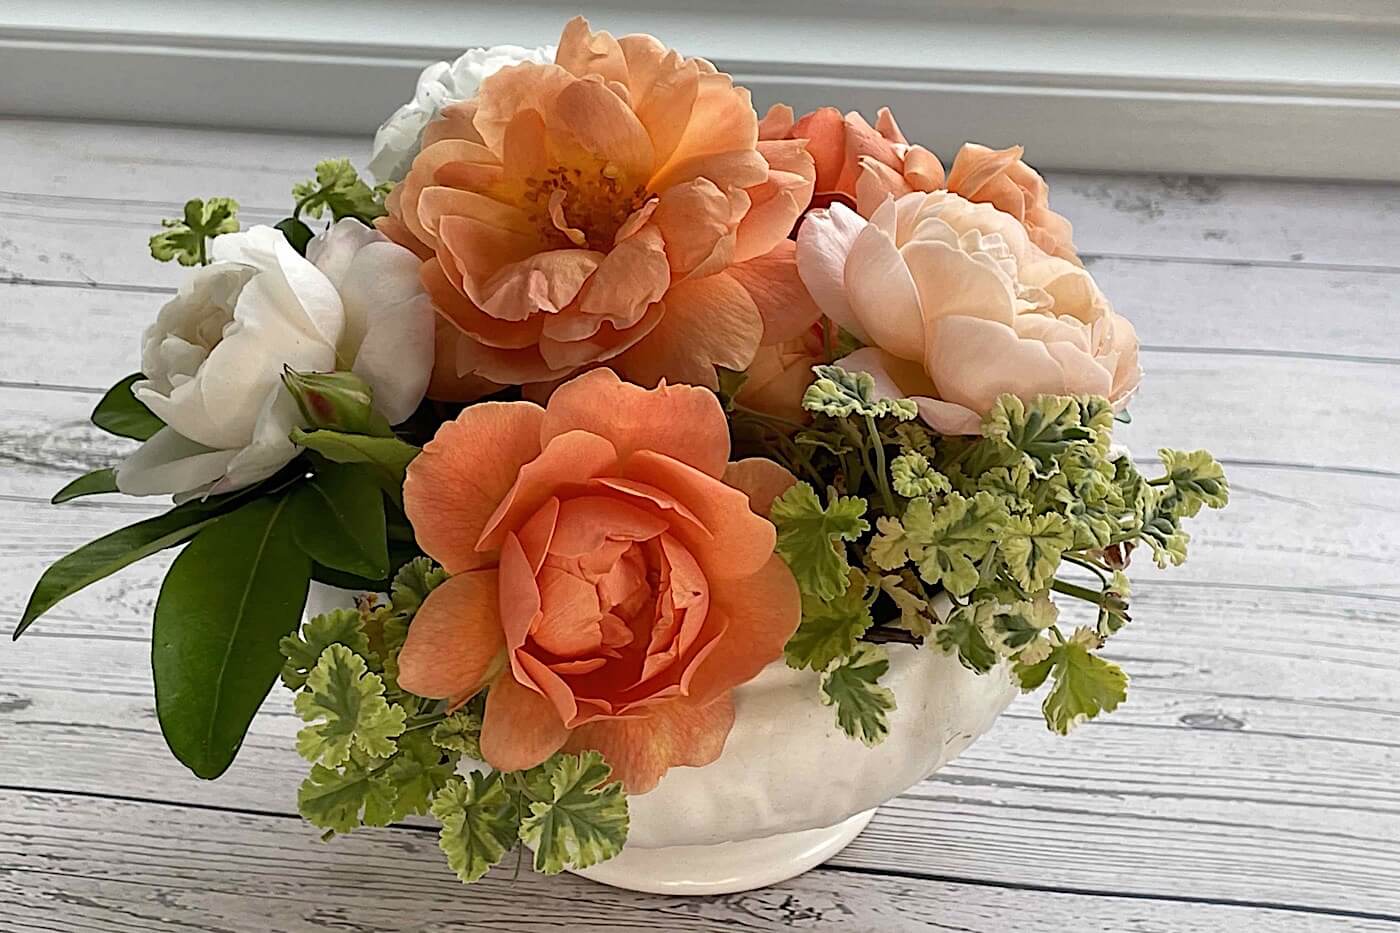
A week later, I’d forgotten to add water and most of the flowers had wilted but the foliage was still going strong. So I picked out all the flowers and then lifted up the grid with the foliage still in it and put in on another similarly shaped bowl that I liked better. Then I added some roses to make another arrangement with a great fragrance.
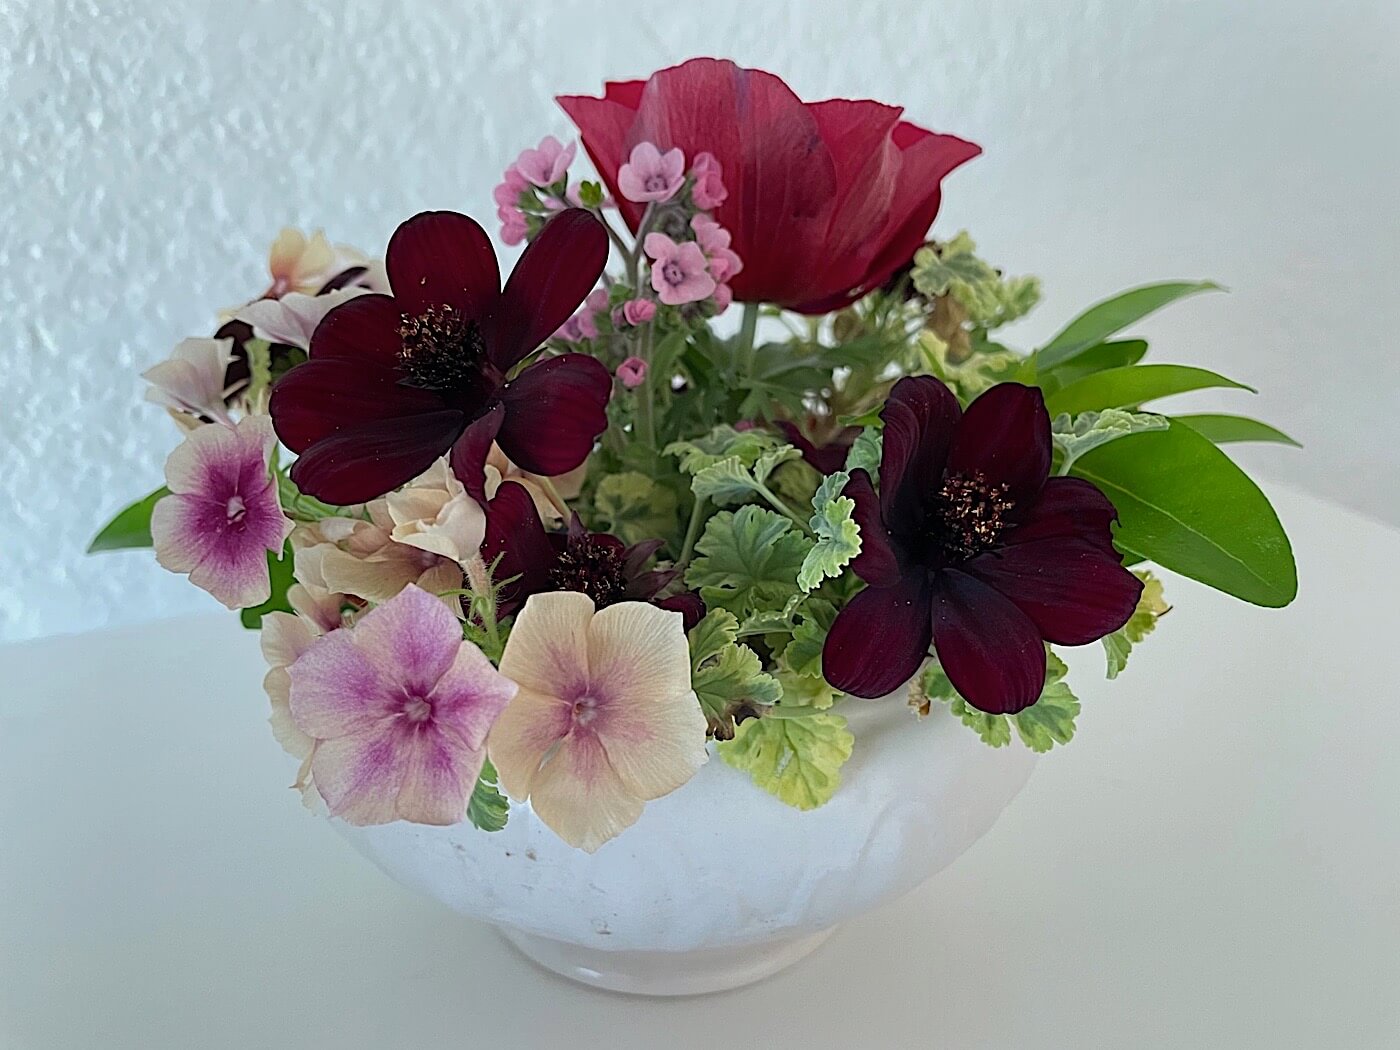
Roses don’t last long of course, and so a few days later I was picking them out, and the foliage (it had now now been over two weeks) was still in quite good shape. I took off a few yellowing leaves that had got into the water and added some more phlox, this time ‘Cherry Caramel’, some chocolate cosmos and an Anemone ‘Bordeaux’ that had suddenly decided to pop up in the garden. So all in all, just under three weeks and I’ve had three different arrangements using the same foliage. I thought that was quite a success, and the arrangements were so simple to make and to change because of the grid I had made.
Gourd grids
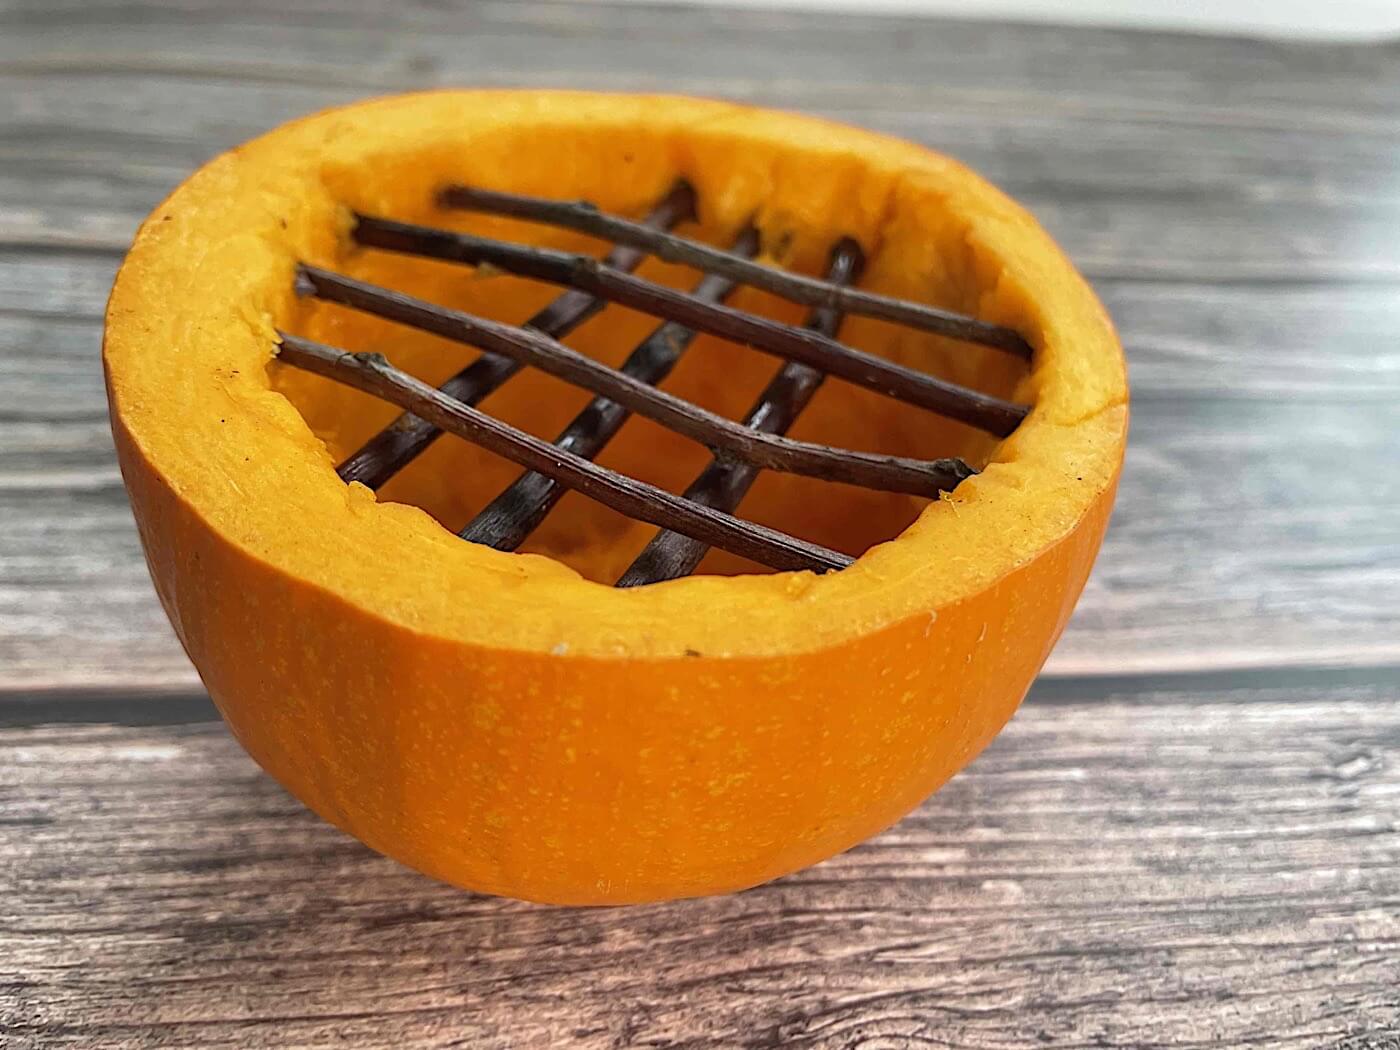
And if you’re in North America and thinking about Thanksgiving, a grid also works really well in gourds and pumpkins (and no tying together needed). Here one I made using a mini pumpkin. Only trouble was that I got carried away and used too many flowers so the pumpkin itself disappeared.
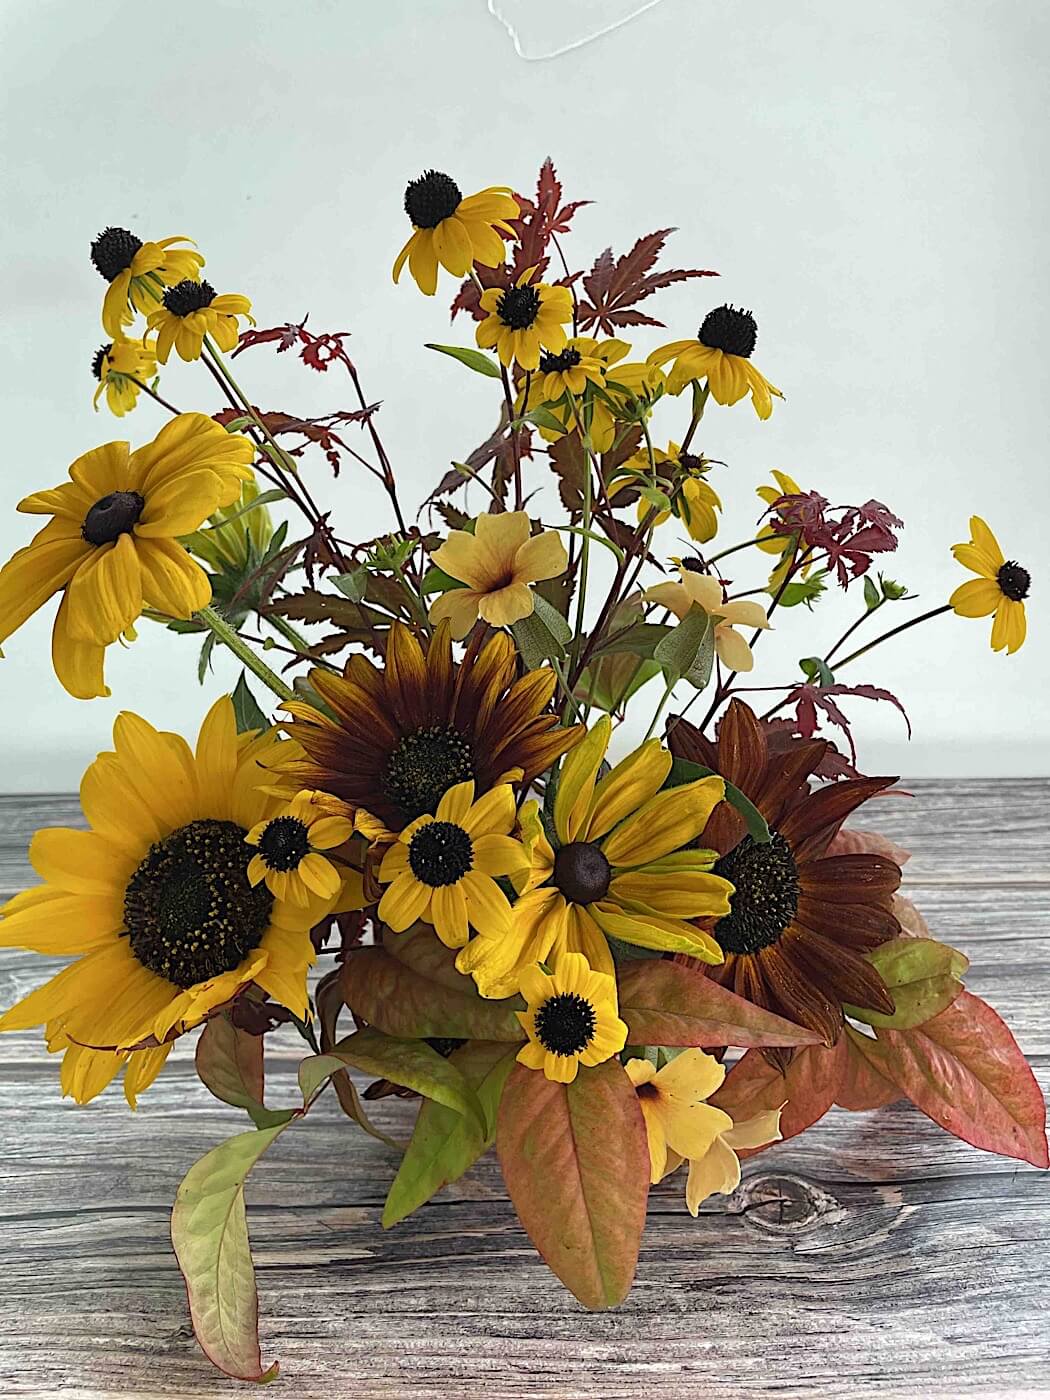
I think these flower grids are going to be very useful at Christmas for making decorations, and I’m starting to work on using more interesting twigs and seeing if it is possible to make the grid itself a part of the overall arrangement.
Receive updates via email of new articles.
Receive updates via email of new articles.
Latest Articles

Crazy about Cosmos
Flowers for summer bouquets I

Ranunculus Revisited

Review of Rachel Siegfried’s The Cut Flower Sourcebook

Tulips

Victorian flower arranging

Easter lilies

Spring has sprung: here comes the daffodil

Pleasures of the nose: fragrant flowers in early spring

Violets for Valentine
Subscribe to My Blog
Enter your email address to receive an email notification whenever a new article is posted.